Easy DIY Lotion Bar Recipe Anyone Can Make
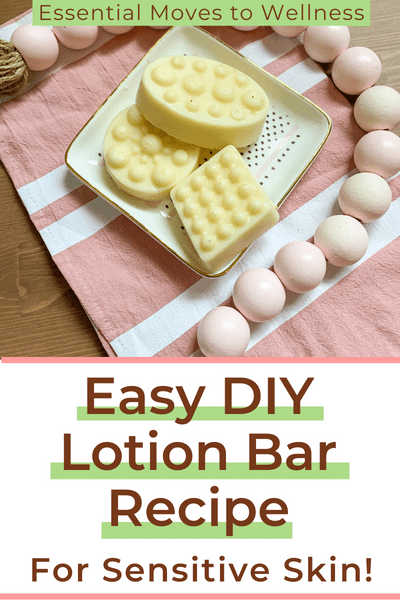
This homemade lotion bar recipe is all natural and super easy to make!
Are you looking for a deep moisturizer for those extra dry places? Such as your elbows and knees? Then this lotion bar recipe is just what you need! 🧴
DIY lotion bars are full of heavy moisturizers, such as coconut oil, shea butter and cocoa butter. They are super good for treating eczema and rashes as well!
This post contains affiliate links. You can learn more here.
Pin this image for later!
What is a Hard Lotion Bar?
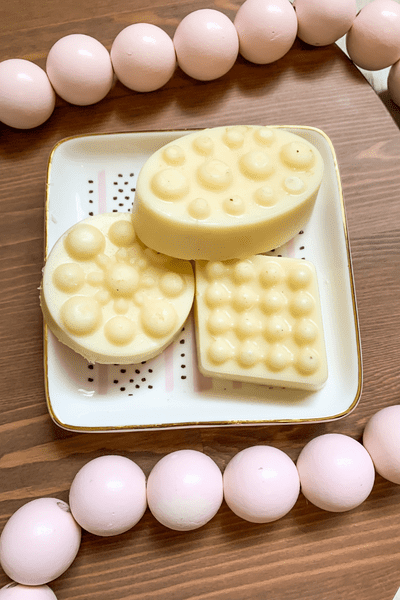
A hard lotion bar is simply lotion that is solid at room temperature. It looks a little like a soap bar, only it’s lotion. 🧼
They come in other forms as well. You can pour the melted oils into a jar or a little metal tin, and use it sort of like a salve, by rubbing your fingers across it.
Or you can easily make it into a stick. But the most common form is the lotion bar.
Why Should I Use a Lotion Bar?
Lotion bars are amazing for very sensitive skin! They are full of all natural ingredients that heal and protect extremely dry skin. They can even treat eczema, rashes, and psoriasis. 🤯
And lotion bars only contain the stuff you absolutely need! You don’t have to worry about any pointless additives or any other funny business that comes with traditional natural lotion.
Plus, with this lotion bar recipe, a little bit goes a long way! Lotion bars are inexpensive and cost effective. 💸
If you have extremely sensitive skin and want to make your own lotion but the idea sounds intimidating, this is your solution! Lotion bars have all the good stuff your skin needs without any extra work.
And they are so much fun to make! You can literally customize this recipe however you want, making your own fabulous scents. 🌸
How Do You Use a Lotion Bar?
Use solid lotion bars in the same way you’d use body lotion. Simply rub the bar over your skin, as you would a soap bar.
Or rub it between your hands, and then rub the lotion over your skin. Some people even use a homemade lotion bar as lip balm! 👄
The friction from rubbing the bar in your hands or across your skin will warm the bar up, softening the lotion. This makes it easy to massage it into your skin.
What You’ll Need for This Recipe
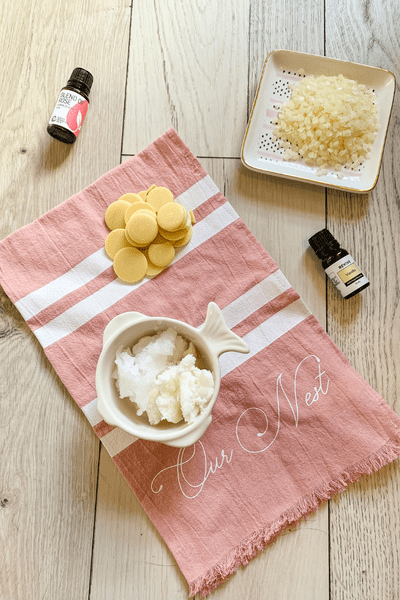
If you are ready to make lotion bars, here is what you’ll need for this basic recipe:
- 4 ounces coconut oil
- 4 ounces shea butter
- 4 ounces cocoa butter
- 4 ounces plus 3 tablespoons beeswax (See note below)
- 30 drops of essential oils
- Small circular tins
- Circular soap molds or lotion bar molds
Super simple, amazing all natural ingredients!
*Note: I added an extra 3 tablespoons of beeswax to this recipe so you don’t have to go through what I did. I originally made this recipe without the extra beeswax, and the result was rather messy. I go into more detail further down this post.
It was infuriating! I highly recommend you add all three tablespoons of beeswax if you’re using a hard mold like I did. But if you’re using a silicone mold and like your lotion bars a bit loose, you could probably get away with two or even one tablespoon, but you have been warned!!
About the Ingredients
The ingredients in this lotion bar recipe are so good for dry skin! If you want to give your skin a treat, make lotion bars!
Coconut oil – 🥥 Antibacterial, anti-fungal, and rich in antioxidants. Coconut oil helps prevent the formation of free radicals, which causes the skin to lose its elasticity. It helps to prevent saggy skin, age spots, and wrinkles, as well.
I wouldn’t use it on your face, however. While it’s extremely moisturizing, coconut oil can clog your pores.
Cocoa butter – 🧈 Rich in Vitamin E and fatty acids, which improves skin tone and elasticity. Cocoa butter is regularly used to soothe dry skin, rashes, eczema, scars, stretch marks, and even psoriasis.
Shea butter – 🧈 Also rich in fatty acids and antioxidants, Shea butter helps to improve the skin’s natural barrier. It also helps to reduce scarring and fights breakouts.
Like cocoa butter, Shea butter is often used to treat dry skin, rashes, eczema, and psoriasis. A tub of this stuff will last you a good long time!
Beeswax –💛 Locks in moisture and adds a protective layer to the skin’s barrier. Beeswax also helps the lotion bar to remain firm and hold its shape. It’s a DIY beauty must-have! You can always add more or less depending on the consistency you prefer.
Essential oils –💜 Used to create the scent of your choice. I went with rose and vanilla and it was heavenly!
How to Make a Lotion Bar
Now that you have all of your ingredients, it’s time to make your lotion bar! It’s super easy to do.
1. First, create a double boiler by bringing a pot of water to boil. Place a heat-safe bowl over the boiling pot of water. I ended up using a glass mason jar instead and it worked great. Just make sure you heat the water with the jar in it!!
2. Melt all of your oils together in the double boiler. When everything is melted down, remove the bowl from the pot of water, and add essential oils. Make sure you mix well!
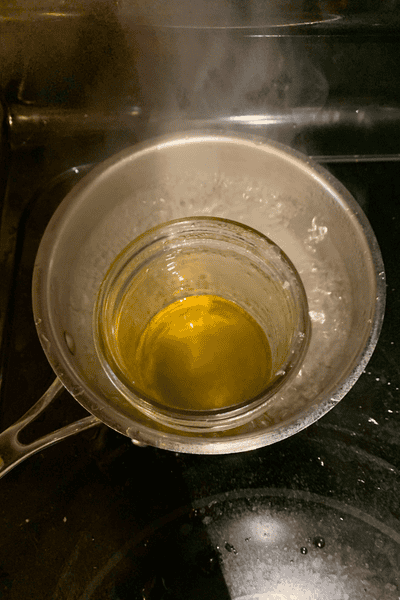
3. Slowly pour your liquid oil mixture into your molds and let them stand until cool.
4. Remove your lotion bars without destroying them by flipping the molds over and warming them with a hair dryer. The lotion bars should slide right out.
5. Let them cool completely before handling! Store your bars in a circular tin, in a dry, cool place.
Note: You can measure your lotion ingredients in equal parts, if you can’t measure by weight. For example, you can measure each ingredient by ¼ cup instead.
Pro Tip! The first time I made these natural lotion bars, I had a hard time getting them out of the plastic soap molds you can see in the picture below. In fact, they turned out awful!
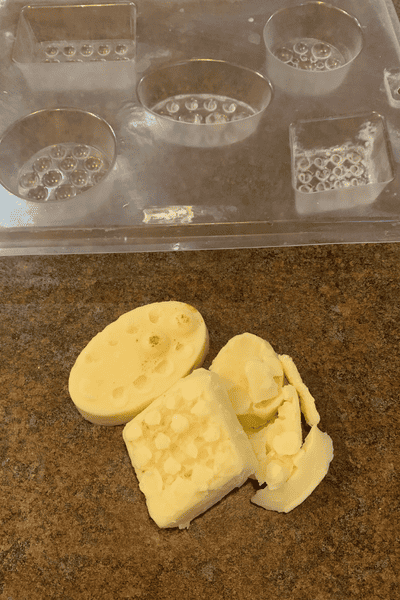
I had to remelt everything and try again. This time, I made sure that all sides of the molds were mildly warm so they would slide out on their own. But, alas, the result was much like the picture above.
That’s why I highly recommend you add an extra three tablespoons of beeswax to keep your lotion bars intact when they come out of their molds! If you’re using silicone, you could probably get away with two, but be cautious!
DIY Lotion Bar Recipe
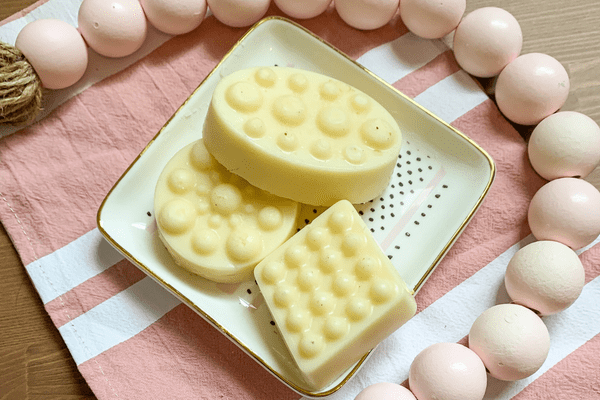
Soothe dry, irritated skin with this easy lotion bar recipe! It has all the benefits of natural lotion without being a ton of work to make.
Materials
Instructions
- Create a double boiler by bringing a pot of water to boil and place a heat safe bowl over top of it.
- Melt all of your oils together in the double boiler. When everything is melted down, remove the bowl from the pot of water and add your desired essential oils.
- Slowly pour your melted oil mixture in your molds and let them stand until cool. Remove your lotion bars by warming the outside of the molds and enjoy! Store in your circular tins and keep in a dry, cool place.
Notes
You can measure your lotion bar ingredients by having them be equal parts of each other. For example, if you can’t measure by weight, you can measure in ¼ cup increments instead.
Packaging Your Lotion Bars
Wrap your lotion bar in a cello bag, parchment paper, wax paper, shrink wrap, or a dry cloth for storage. Then put the bar into a cardboard box, tin, jar, bag, or whatever. What you use will depend on the shape of your bar and how many you intend to store. 📦
Whatever you do, don’t wrap your lotion bar in plain paper. 🚫 It’ll stick to the bar!
If you are going to use your lotion bars right away, you don’t need to wrap them before storing. You can use little metal tins, which are perfect for your purse!
Lotion Bars Make a Gorgeous Gift!
You can totally make these lotion bars to give away as gifts! They make perfect gifts for baby showers, bridal showers, birthdays, teachers, Christmas gifts, and thank you gifts. 🎁
You can make these lotion bars more masculine by adding more manly scents, such as sandalwood or oak moss. Turn the lotion bar into a stick by filling a deodorant stick as well!
Pair your lotion bar with some other great DIY beauty products, such as a sugar scrub, bath bombs, or homemade lotion!
Need some cute ways to wrap it? Try these:
- Wrap them in parchment paper and twine, and add a homemade gift tag
- Wrap the bar in a jumbo cupcake liner and seal it with a sticker
- List the scent and the ingredients
Frequently Asked Questions
Let’s go over some common questions, when making lotion bars. And if you don’t see the answer you are looking for, feel free to put your question in the comments below!
Do You Use a Lotion Bar Mold?
Yes, I use either a lotion mold or a soap mold. But you don’t have to. You really can use whatever you want to!
Here’s a few ideas:
- Cupcake tins
- Ice cube trays
- Silicone molds
- Glass jars
- Lip balm tubes
- Candy molds
- Salve tins
- Deodorants
Basically, if you like the shape of a container, you can use it! Just be mindful of how you’re going to take it out when you’re done.
How Do You Make Lotion Bars Firmer?
If your lotion bar isn’t firm enough, I’d say remelt it and add more beeswax. Then pour it back into the molds and try again.
Or you can use a wax with a higher melting point, instead of beeswax. Candelilla or carnauba are great choices. 👍
How Do I Store Lotion Bars?
Store lotion bars away from direct sunlight or heat – they can melt! It’s best to keep them in a sealed, airtight container as well.
This will keep it from melting all over everything else if you put it in your purse. Or, put your lotion bar in a small metal tin, like I do.
How Long Do Homemade Lotion Bars Last?
The shelf life isn’t too long for lotion bars. They generally last about 6 months. If you don’t think you will use them all, then I’d recommend starting with a small batch.
Or give them away as gifts. I always get a good reaction from my lotion bars. 😏
Substituting Ingredients in Your Lotion Bars
Here’s a list of the most common questions about ingredient substitution. If you don’t see the answer you are looking for, post your question below! I’m happy to help.
What Can I Use Instead of Coconut Oil?
You can substitute shea butter, mango butter, or cocoa butter for coconut oil. Jojoba oil, avocado oil, grapeseed oil, or olive oil are also great options.
What Kind of Beeswax Do You Use in Lotion Bars?
When you shop for beeswax, make sure to get organic and cosmetic grade beeswax, so that you don’t need to worry about those nasty chemicals making their way into your all natural lotion bars.
I like Sky Organics Beeswax. I buy the beeswax pellets because it’s easiest to measure then. Never buy it in block form! I learned that the hard way. 😑
Is There a Vegan Alternative to the Beeswax?
Yes! Carnauba wax, soy wax, and candelilla wax all work beautifully.
If you are using carnauba wax or candelilla wax, try using a little less than half of what the recipe calls for in beeswax – so 1.5 to 2 ounces of candelilla wax or carnauba wax should do.
If you are using soy wax, you can use the same amount as you would beeswax.
What Other Essential Oils Can I Use in This Lotion Bar Recipe?
You can literally use whatever essential oils you want! I used rose and vanilla in this batch and it came out like a dream. 😍
But you could also use:
- Peppermint and vanilla
- Lavender and lemon
- Wintergreen, peppermint, lavender, and orange
- Orange
- Lemon and lime
You can click here to check out my favorite place to buy essential oils. You can even use the code ESSENTIAL10 to get 10% off your first order 🙂
Where to Buy Lotion Bars
If you don’t want to mess with making your own lotion bars, but you still want to reap the benefits, you can buy them.
Kosmatology has a great line of lotion sticks. They are made from shea butter and olive oil, and come in grapefruit, spearmint rosemary, lavender, and unscented. Click the button below to shop!
Final Thoughts on Lotion Bar Recipes
If you want to make your own lotion, this lotion bar recipe is a great starting point. It’s easier to make than my homemade lotion recipe.
This lotion bar is great for your entire body, but especially good for those really dry spots, such as your elbows, knees, and maybe even the bottom of your feet.
It is a very deep moisturizer, however, so I’d be hesitant to use it on your face. You probably want a lighter option for your face.
Give it a try and let me know how it works for you in the comments below!
Related to Lotion Bar Recipes
Easy DIY Lotion Recipe that’s Non-Greasy and Fast-Absorbing!
The Best All-Natural Sunburn Remedies to Make at Home that No One Talks About
Natural DIY Vapor Rub Recipe that Won’t Irritate Your Skin (Fight Congestion and Moisturize!)
Winter Skin Problems | How to Take Care of Dry Skin Naturally

