My Favorite Soap Making Kit | How to Make Bar Soap at Home!
Best Soap Making Kit
Do you like to make gifts for people in your life instead of buy them? Or do you want to dabble in the wonderful art of soapmaking? You’re in the right place! We’re going to deep-dive into how to make your own natural soap at home, as well as some details on my favorite soap making it.
Making your own bar soap at home can be a little intimidating if you’ve never done it before. But I promise, it’s much easier than you think! I see it as more of a fun craft than a super intense DIY project. It’s really a matter of customization that’s totally up to you.
Pin this image for later!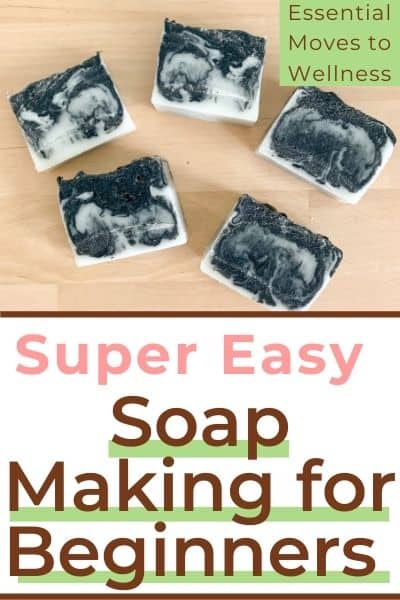
This post contains affiliate links. You can learn more here.
How Do You Make Homemade Soap Bars at Home?
If you want to keep things super simple and easy when it comes to making your own soap at home, it really depends on how you decide to go about the creation process. A great soap making kit is helpful, but there are two ways you can make some super cute DIY soap:
- You can make everything from scratch.
- Or you can buy a pre-made soap base.
Making your own soap from scratch involves a lot more ingredients, which wouldn’t be that big of a deal if lye wasn’t involved. Lye is most commonly known as sodium hydroxide and is usually made from leeching wood ashes.
Lye is a highly dangerous substance that can cause severe skin irritation. The fumes alone can damage the lungs when mixed with water. If it comes into contact with any mucous membrane, like the eyes or mouth, the burns can be so severe that death can come as a result.
You’ll have to mix lye with water in a very controlled environment and practice several safety precautions if you want to make soap from scratch. If you have children or pets at home, I would advise you to never buy lye at all! The risk is simply too high if they got into it.
I even had a blogging friend who owns her own DIY skin care shop stop selling soap altogether when her children learned how to walk and talk. She couldn’t stand having such a volatile substance in the same house as them!
Make Soap Making Easy and Buy a Melt and Pour Soap Base!
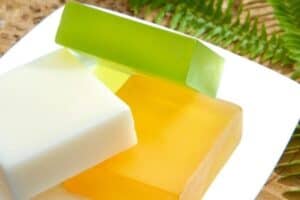
That’s why I highly recommend you buy a natural soap base instead. It makes the process much, much easier, and there’s no lye! A soap base (also known as a melt and pour soap base) is the soap itself already made without any coloring, scents, or other additives. Although you can definitely buy a soap base with colors and scents if you like.
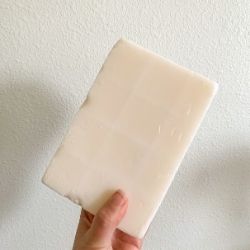
All that’s left for you to do is customize the soap however you want. Oh, and cut it up and make it look pretty using a soap making kit! You can buy fun little molds, like rose-shaped silicone molds if you’re making rose-scented soap, for example. But most soap making kits (like the one I’m using today) already come with their own mold.
You can add your customizations to your homemade soap by melting the base down and adding all of your mix-ins. But that’s the fun part, and we’ll get that in a minute.
What Are the Ingredients for Soap Making?
If you’re new here at Essential Moves to Wellness, we take ingredients here very seriously. I’m all about helping busy women make a stress-free switch to natural and DIY beauty products, so I always read my ingredient lists with a very stern eye.
I’ll get the soap base itself in a minute, but I would warn you to be careful about what additives you decide to put in your soap. You can try to make your own soap to be more natural, but the additives can throw that entire notion out the window.
If you want your bar soap to be completely natural, I would use whole ingredient colorants and essential oils for scent. Don’t use any fragrance oils!! Companies are not legally obligated to reveal the ingredient list behind their fragrance, which means that literally anything could be in a fragrance oil.
Essential oils are a much better option because they have actual skincare benefits too. Looking for anti-aging skin care? Go with rose essential oil. Want to help fight body acne? Add some tea tree.
As for the colorants, go with whole natural ingredients! I’ve found that colored clays can be your best friend. This article on natural soap colorants gave me a ton of great suggestions. I would love to make a rose-scented soap with pink rose clay!
What is the Best Base for Homemade Soap?
The actual soap base should also be scrutinized to make sure that you’re not making a fun DIY product with a ton of questionable substances in it. Unfortunately, the options for a good, natural soap base are pretty limited.
My biggest piece of advice is to not get the soap bases you can find at most craft stores! This goes for Michael’s, Hobby Lobby, even small companies online. I tore the website of all these companies apart, and I was pretty depressed to find that almost all of them contained sulfates. Sulfates are an ingredient that is too harsh for the skin and can make it hypersensitive over time.
I thought I’d be able to find some good soap base in-person at my local craft store, but that wasn’t the case. Your best bet is to search “natural soap base” online and most of your results should be fine. If you see one that says “sulfate-free,” you should be in the clear.
I found this shea butter soap base online that I made sure has clean ingredients before buying. Shea butter is great for your skin, as well as evenly distributing ingredients within the soap!
Also make sure that you steer clear of any ingredients like triclosan, parabens, or phthalates. Those have been known to cause hormonal disruption, create new, tougher strains of bacteria, and severe skin reactions.
You’ll typically find glycerin, shea butter, or olive oil on the label of your natural soap base, which is great! Those are all things you would need if you were making your soap from scratch. But there’s likely more stuff in there than you think.
Is It Expensive to Make Your Own Soap?
It really depends. If you add all the bells and whistles and make each batch a big one with new ingredients every time, then yes, it’s more expensive. You have to consider the cost of your ingredients as well as your supplies.
The biggest things I would say to keep in mind is buy essential oils and clays that you plan on using again in several other DIY’s. All of my essential oils are used in just about everything, not just soap. This cuts down the cost of making your own products big time!
I also keep bentonite clay and pink rose clay on hand for facials. I wouldn’t get a specific ingredient you’ll only use in your DIY soap unless it’s for a very special occasion. Christmas is a good excuse!
Also make sure to make everything in small batches, and keep your soap making fails! They’re still good to use on your own. As long as they won’t cause an adverse reaction, you should be stocked to the brim all the time with soap fails as a soap maker! And you can’t underestimate the power of a good soap making kit.
How to Make Your Own Soap Using a Soap Making Kit for Beginners
I was gifted this handmade soap making kit from Emerging Green recently to try my first ever batch of DIY soap! I’ll admit that I’ve avoided making my own soap on the blog because I found it way too intimidating, but after testing this soap making kit for myself, I’ve been converted!
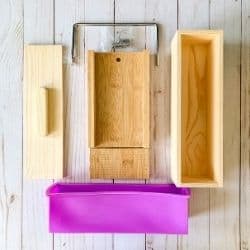
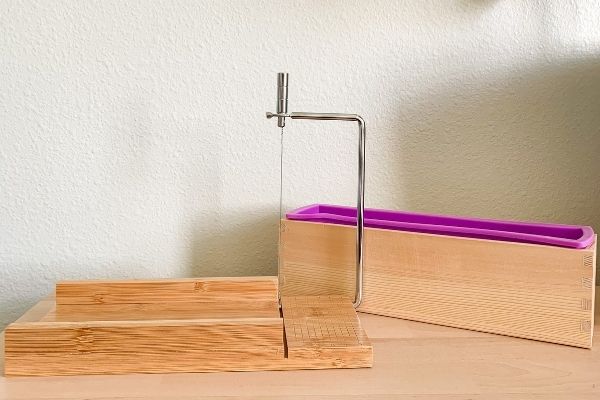
It comes with a soap cutter, a silicone mold ideal for mini bars, and a wooden holder and lid for the mold. All materials are made from pine and bamboo materials, with the exception of the metal cutting apparatus. This stays in line with Emerging Green’s mission of selling lifestyle products that are biodegradable and help the environment.
Because of the small mold and simple design of this soap making kit, it’s perfect for melt and pour soap making projects! If you have someone in your life that is thinking of diving into the world of soap making, this is a great gift. It’s also a great soap making kit for kids, because everything comes together in a very simple and straightforward way that is easy to understand.
To use this eco-friendly soap making kit, simply measure out your finished bar of soap according to the notches on the end, then push the wire apparatus down towards you until the soap is cut through. That’s it!
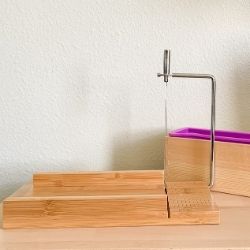
Of course, I’m going to take you through how I made my first batch of soap, but I was very impressed with how simple and easy it was to use!
My First Time Using a Soap Making Kit
The basic instructions for using a melt and pour soap base is to first chop up the base into little one-inch cubes. Luckily, the soap cutter made this super easy! I felt defeated at the thought of having to cut up this two-pound block of shea soap base with a knife, but the soap cutter did its job beautifully.
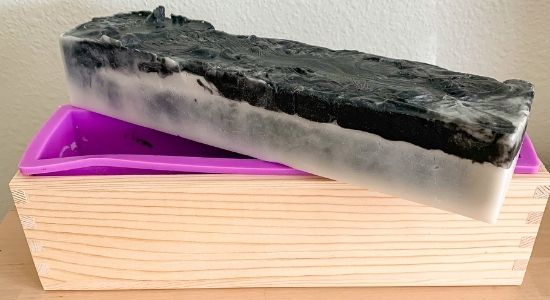
I decided to go for a slightly advanced technique and add some color to this soap by using activated charcoal. But I took it one step further and split the block of soap base in half. I melted down each half in a microwave-safe container until I was left with a hot liquid. Then I mixed four capsules of activated charcoal (about one tablespoon) in one half.
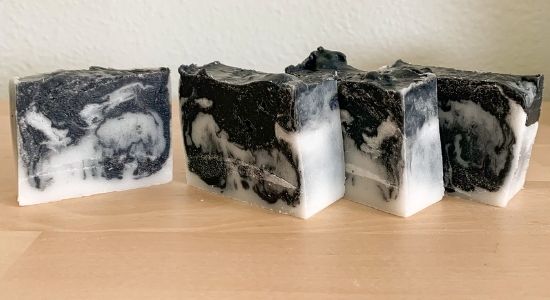
In the other half of the melted soap, I added about one tablespoon of rose essential oil to make my own charcoal rose-scented soap. I would have the detoxing effects of the charcoal, plus the anti-aging skin care of the rose essential oil. It’s a win-win!
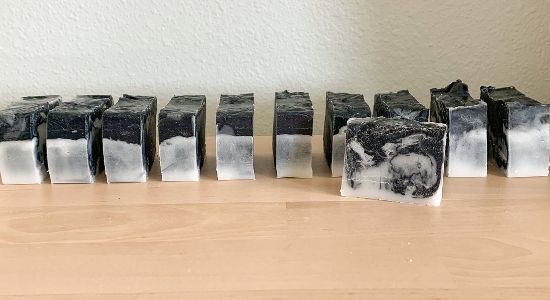
To make things more visually appealing, I thought I would add in the white rose-scented half to the silicone mold first, then add the black charcoal half and swirl things around. Once everything cooled after about an hour, I tapped the soap out of the mold and cut everything up using the soap cutter at the little number two notch.
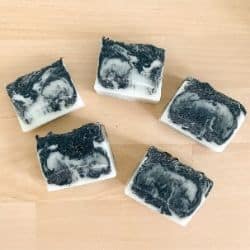
That’s it! I was left with these adorable mini soap bars that turned out better than I thought. I definitely had different thoughts while I was making the soap, though. You can check out my first-timer tips below.
Some Tips and Tricks I Learned While Making My Own Soap
If you’re wondering how the swirling effect went, it was…okay. My problem was that the shea soap would solidify pretty quickly, which meant that I was constantly reheating my two soap mixtures in the hopes that it would mix better.
I learned two things from this choice. The first being that if you want to work with two colors of soap, I wouldn’t do the microwave method. I should’ve gone with the double boiler method instead. That way, my mixtures would’ve stayed consistently hot until they were ready to pour.
The second thing I learned is that I should have gone more for a ratio of 70/30 for the white and black soaps instead of half and half. That way, I wouldn’t have ended up with mildly grey soap you see in the pictures. But that’s mostly bad planning on my part. You live and learn!
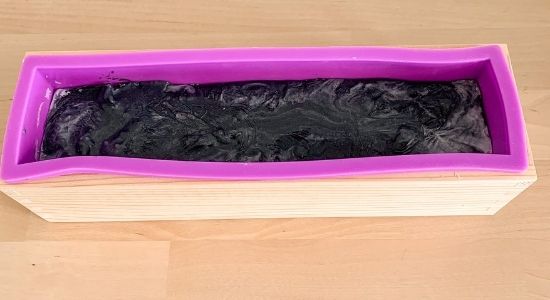
I was actually rather impressed with how the soap looked when I cut it. But I thought for sure that I just created black soap when I first poured everything. The only major critique I would give myself is to mix it around more next time.
I also learned that the two-pound block of shea soap I ordered fit the mold perfectly, with room for a bit more. So if you’re wondering how much soap to get for this mold, I would go with two to two and a half pounds.
As for cleanup, any thick residue left behind in my containers peeled off instantly, while any thinner residue took a bit of scrubbing. But because it’s soap, it disintegrated off after just a few scrubs.
Final Thoughts on This Soap Making Kit
Overall, I’m very happy with how my first time making soap went! I learned a few things that I can’t wait to try on my next round. In the meantime, I am very proud of my first batch of charcoal rose soap.
If you’re wondering how the soap itself is, I think it works great! It has the right amount of scent, it lathers easily, and it doesn’t leave behind any kind of weird residue on my skin. I plan on giving the remaining blocks to my family as Christmas gifts this year and I’m so excited to see their reactions!
I want to thank Emerging Green again for sending me this lovely soap making kit. Making my own soap was a topic that I avoided like the plague on my blog because I thought that it was too complicated and dangerous, but I’m a soap making convert!
Have you ever made your own soap before? Let me know in the comments below!
Articles Related to this Soap Making Kit:
